Blog

  • State of the Business Address

    Tap…tap…tap. Is this thing on? Hi friends! (And family? Mom? Are you still reading?) I just thought I’d write a quick post to mention a few things about the state of my photography business and thus the direction of this blog. You may recall, I announced at the beginning of 2013 that Chris was stepping out of his position as my second shooter. At that time I also decided to only book smaller weddings since I was starting to feel the strain of working seven days a week most of the year. Alas, even smaller weddings, events, and a few portrait and commercial clients still kept me quite busy! With two jobs, I worked more weekends than I was comfortable doing. So in order to simplify things, I am now only working as a second-shooter for other photographers as needed so that I can spend the rest of my free time with Chris, travel more, and to do lots of projects around the house. I consider this step a really positive thing! I have been incredibly fortunate to run a successful business for six years, and while the amount of work was exhausting, the experience is priceless and so worth the time and effort. I learned exactly what it takes to own a small business, and about all the cogs and gears behind the scenes that make it work. And who knows? Maybe someday I’ll pick the business back up, or perhaps apply the knowledge towards another business altogether.

    So where does that leave the blog? Well, I started blogging aimlessly waaay back in 2003 on Blogger. (Side note: I think I accidentally deleted that whole blog?! Thankfully I had already saved the content as PDF files on my computer, in case I want to recall what I ate for lunch on April 17, 2004.) Then in 2008 when I decided to start up a photography business, I transitioned my blogging to business-related topics and posts about my fantastic clients’ weddings, portraits, birthday parties, etc. So I think now I’ll just come full-circle and go back to blogging aimlessly, mostly about travel, house projects, and cooking adventures. In any case, I’m recommitting to blogging more regularly and my goal is to post new content at least once a week on Mondays. (“And on Wednesdays, we wear pink.”)

    And here’s photo evidence that I’m probably meant to write in some capacity. I enjoy blogging, it’s a creative outlet for me, and writing has obviously been a natural inclination of mine ever since I was in diapers:

    typewriter_blog

  • Light It Up, Up, Up

    Light It Up, Up, Up

    We’re finally done refinishing and replacing the last of our brass lighting fixtures in the house! Not that there’s anything wrong with brass at all, and I know it’s gaining some popularity again as of late, but the fixtures we have are all builder grade and just not as warm and cozy as I’d like them to be. Plus I had already switched out all the brass hardware on our doors, so updating the light fixtures ties everything together nicely. There were five fixtures total – the dining room chandelier (which was covered with a DIY drum shade since I have yet to find a fixture we like), three ceiling flush-mounts in our hallways, and one pendant fixture at the bottom of our second-floor stairs. Replacing all five fixtures would easily be over $1000, and I’d rather spend that on an international plane ticket! Plus the dining room chandelier would have required an electrician’s assistance. So we decided to DIY four of the five fixtures, and splurge just a little on the pendant light. Here’s what we did.

    The three hallway ceiling fixtures were all the same – this octagon shaped flush-mount seen below. We will probably replace them eventually, but I don’t hate the shape and I wanted to see what bronze fixtures would look like everywhere, so in the meantime I decided to just spray paint it with my favorite Rustoleum oil-rubbed bronze paint. It says it’s a primer and paint all-in-one, but I wanted good coverage, so I also used a primer spray as my first coat.

    01_lighting_blog

    Before all the spray paint though, I taped the heck out of the glass panes and cut pieces to fit with an x-acto knife. Now listen, this isn’t a quick project because of the tape, and maybe there’s a better method. (Maybe you could cut pieces of paper to fit in over each area of glass?) But I already had Frog Tape, and a free afternoon (for each light – I didn’t do them all at once), so I went with this method and it works fairly well. I say fairly well because some spray did get on the other side of the glass underneath because of the hole in the top. I easily scraped any excess paint off with a razor blade. Oh and to do the mounting plate, I stuffed little bits of rolled-up paper towel in the light bulb sockets so as not to get spray paint into the sockets. I did three coats total – one coat of primer, and two coats of the bronze. I allowed the recommended dry time in between each coat, and then I let it dry for a full 48 hours before reinstalling the fixture. But before the final coat dried, I carefully peeled off all the tape.

    02_lighting_blog

    The results are great! It’s still not as fun of a statement piece as I’d like, but I think it’s an improvement over the brass. P.S. The little “hello” sign in the photo below will get painted soon. I’m still trying to decide on a color! And sorry for the clutter in our organizing station. There’s an oxymoron for you – cluttered organizing station! (The wire bin is for paper and mail recycling if you’re curious.)

    03_lighting_blog

    The beauty of spray painting the ceiling flush-mount fixtures was that from any vantage point the new finish looks like it was purchased that way unless you stand and study it. The inside shows sort of a bare metal (not brass) because I didn’t try to paint over it, but it’s not shiny and it’s enclosed so you really can’t tell. The pendant lamp shown below posed a different issue. The fixture isn’t enclosed, and standing beneath it you can easily see inside, so I’d have to tape (and tape and tape) both the outside and the inside in order to paint the whole thing. And that would be in addition to the chain, the wires, and the mounting plate cap. The fixture is in a prominent area of the house as opposed to the foyer and hallways where we just pass through, so I wanted the lighting to look nicer than my DIY skills.

    04_lighting_blog

    So, ta da! I had been searching for a suitable fixture that we’d really like, and this one showed up at Pottery Barn just recently. Here she is all installed thanks to my super patient and handy hubby!

    08_lighting_blog

    The fixture came with one of the cool hipster filament bulbs, but I felt like it was actually a little too small for the lantern and didn’t quite give off enough light, so we just used the big globe we had in there before. I like it.

    05_lighting_blog

    I’d especially like to reiterate how patient Chris is because this was not an easy installation. We have the electrical part down pat at this point, but this fixture was on a sloped ceiling at an awkward angle in a tight spot next to the stairs. Our ladder has a big footprint and would barely fit in that area, so getting the mounting plate screwed in nice and tight was a challenge. Not to mention I had to find somewhere to stand and hold the lantern part while he connected wires and attached everything. It was a good shoulder workout! But we like the results, and other than one more (chrome) fixture in the master bath, we should be done with lighting for a while!

    06_lighting_blog

    What do you think? Are these an improvement over the brass fixtures? (We think so!) Do you have any lighting projects coming up? Let me know – I’d love to see your results!

    Note: This post contains affiliate links. If you purchase something through one of my links, I may earn a small commission at no extra cost to you. Thank you so much for reading and for your support!

  • Discovering Scuba Diving

    Discovering Scuba Diving

    Sometime a while ago when Chris and I were having one of our adventure/travel brainstorming discussions about what we’d like to do and where we’d like to go in the future, Chris said he’d love to try scuba* diving someday. Since we planned on visiting the Cayman Islands for a future trip, I began to research and quickly discovered The Caymans are one of the top diving destinations in the world, known for crystal clear waters and beautiful, friendly sea life. I’m typically unable to approach anything new on a casual level, so I immediately decided that if we were going to try scuba diving, we might as well (warning: upcoming pun) dive right in and get PADI certified. You can’t just go dive without some training anyway since there’s a lot involved to it! The certification course consists of three parts – classroom or online study, confined water training (typically held in a swimming pool), and open water dives. I signed up for the first two parts with a local dive shop, and planned to do our check-out open water dives in Grand Cayman since we had already planned to be there.

    I have no problem with the idea of breathing underwater in the pool. That actually sounded fun, so I didn’t think the mechanics of diving would be an issue. But oh, wait…I seemed to have forgotten that I’m fairly terrified of the ocean. Jumping out of a plane? No problem – I didn’t even get the tiniest bit nervous until a few minutes into the flight. Jumping into open water filled with creepy creatures that want to attack me? Problem. I’ve been nervous for months ever since I signed up! And I have absolutely no idea where this fear stems from – I haven’t had any traumatic incidents in the water. I’m not even really worried about sharks when I’m at the beach. It’s the small creatures that freak me out for some reason. (I rue the day I watched a Discovery Channel special about irukandji.)

    Slowly I began to worry more and more about my ability to handle all four of the open water dives required to become certified. So I thought maybe we should do the whole certification on the island and I booked the course with a dive shop that does all the initial training in the shallows of Seven Mile Beach. I figured that way I could gradually get used to being in the ocean. But my anxiety continued to escalate. My concern was that I wouldn’t be a safe diver considering my level of fear when it comes to jellyfish, barracuda and other stinging/biting things in the water. The one thing you can’t do while you’re diving is panic. The other thing you can’t do when you’re diving 30 meters under the surface is bolt back up for any reason – if you ascend too quickly, you risk decompression sickness (a.k.a., the bends). And I’ve been known to panic and bolt in the water! I bolted out of the water at the sight of seaweed on my very first attempt to snorkel in St. Thomas. Seaweed. The second time I tried to snorkel (years later), I panicked and made a beeline to the shore after seeing a stingray at least 10 feet below me at Cinnamon Bay in St. John.

    2014-04-10_0001

    In addition to my fears of certain ocean creatures, I’m also a really (really really) excitable person about almost everything. Especially animals. If I see a turtle while I’m diving, I’m pretty certain I’ll gasp and squeal and flail about just out of sheer joy. Gasping, squealing, and flailing are probably diving no-nos. I have no idea if I can stay calm while diving, and that’s apparently one of the key ingredients: stay calm, and breathe.

    So I decided that the best thing for me to do was to first see if, in fact, I would be fine with diving in a pool. Our local dive shop offers a Discover Scuba Diving (DSD) class where you learn basic skills, equipment usage, and safety in a short classroom session, and then you practice in a pool. Chris and I signed up together (the class was probably unnecessary for him, but he was sweet to humor me) and we completed the class last weekend. Just as I expected, I had a ton of fun in the pool! Getting used to the heavy, complicated equipment was easier than I thought, and we did the basic skills with ease. We learned how to descend, adjust our buoyancy, clear a flooded mask, retrieve a lost regulator, and swim with fins. The only catch was that when our class arrived at the rec center, we found out the pool was double-booked, so the shallow end was already in use and we’d have to complete all of our training in the deep end! It definitely rattled everyone in the class, but it turned out to be easy and so fun (for most people). Chris and I were quickly comfortable at the bottom of the pool, and we hung out just breathing and practicing skills for nearly an hour.

    2014-04-10_0002

    Whether or not I can translate the skills and my comfort level to the open water is TBD, so we’re going to hold off on full certification for now since it’s a fairly big investment in time and money for something I’m not even sure I’ll enjoy! We are signed up for another DSD class in Grand Cayman, where we’ll review the skills in the pool and then go on an open water reef dive off of a boat. If I fall in love with it, I can go forward with the certification and I’ll already have some skills under my belt. If I hate it, I can at least say I tried. I’m excited and nervous, but I’m going to try to stay calm and not chicken out. I think the reef dive is about 30 minutes long, so it’s not really likely that I’ll get stung or bitten right?! Wish me luck!

    *I do realize SCUBA is actually an acronym and was originally always notated in all caps, but after spending some time on dive-related message boards, it seems most divers commonly type scuba as a lowercase word.

  • That Time I Went To NYC…

    That Time I Went To NYC…

    …and took the worst, most boring pictures EVER. Honestly.

    I have been looking through old archives of photos (hence the recent Switzerland, Italy, and England posts from trips I took a decade ago) and I came across my “NY 2005” folder. It’s seriously embarrassing. You might wonder, how is it possible that I went to NYC and came back with such boring photos, especially when photography is my thing?! Oh, and not to mention I was in one of the most interesting cities in the country. Granted, I was there for a business trip and I didn’t have a ton of free time for sightseeing or taking photos, but I did spend an afternoon in the city wandering around a bit with my camera. Not only are the photos boring, they’re mostly unacceptably underexposed. I’m mortified, but I’ll show you a screenshot of the folder.

    ny_folder

    Awful. *Shaking my head.* What happened? In plenty of trips prior to this one, I came back with beautiful photos. Why did I (photographically-speaking) stink up NYC so badly? Well, this was one of the first times I had traveled with my very first digital SLR (a Canon 20D). Oh how fun it was to see instant results instead of waiting for film to develop! Seeing instant images on the LCD right after pressing the shutter button, I immediately fell into the bad habit of thinking, “it’s digital and it’s freeeeeeee to take a picture, so my settings don’t matter! Whee! I can take as many as I want and I don’t have to think about it!” Whereas with film, each frame incurred the cost of the film itself and then also the processing and printing, so I was certainly more careful and thoughtful about my settings, my composition, and the story I was trying to tell in each image. Each image on film was very much on purpose, whereas each instant image on my shiny new magic digital SLR was basically disposable.

    Thankfully, I started to learn that if I want good results, digital photography requires just as much care and purpose as shooting on film. Wedding photography especially has taught me that each digital image does count. In a moment that only lasts for a few seconds (the first kiss, for example), there’s no room for experimenting with settings even on a digital camera – you either know what to do or you don’t. Not to mention the hours and hours I would spend correcting images in the post-processing phase if I didn’t understand how to at least get close to a proper exposure. All of this is to say that if you are trying to improve your photography, a digital camera is an awesome learning tool if you are willing to learn why your first image didn’t turn out the way you wanted, shoot it again, and then apply that knowledge to getting it right the first time on your next shoot. And it’s a constant learning process – I’m still learning and improving, too (the day I stop learning and improving is a sad, sad day).

    So there’s that, and also – don’t be too hard on yourself! It’s actually awesome that my digital photos were so awful nine years ago because it means I need to go back to NYC for a proper visit and a reshoot! Next time I’ll shoot with more purpose and inspiration. Sing it with me…these streets will make you feel brand new, big lights will inspire yooooou. And speaking of big lights and singing, perhaps the highlight of our weekend was seeing a show on Broadway, Movin’ Out, which crosses that item off my bucket list! (Seeing a show on Broadway, not specifically seeing Movin’ Out.)

    2014-04-03_0011

    Okay and just for funsies, here are two images that crack me up. On the left is a guy that Chris and I saw on the train. He’s working (?) on his laptop whilst draping a jacket over his head. What’s the story? Is he doing top-secret work? Can he breathe in there?! And on the right, I wish I had audio to go along with this sign – there were plenty of cars honking and no fines being handed out, so clearly this law is not heavily enforced.

    2014-04-03_0012

  • England 2003

    England 2003

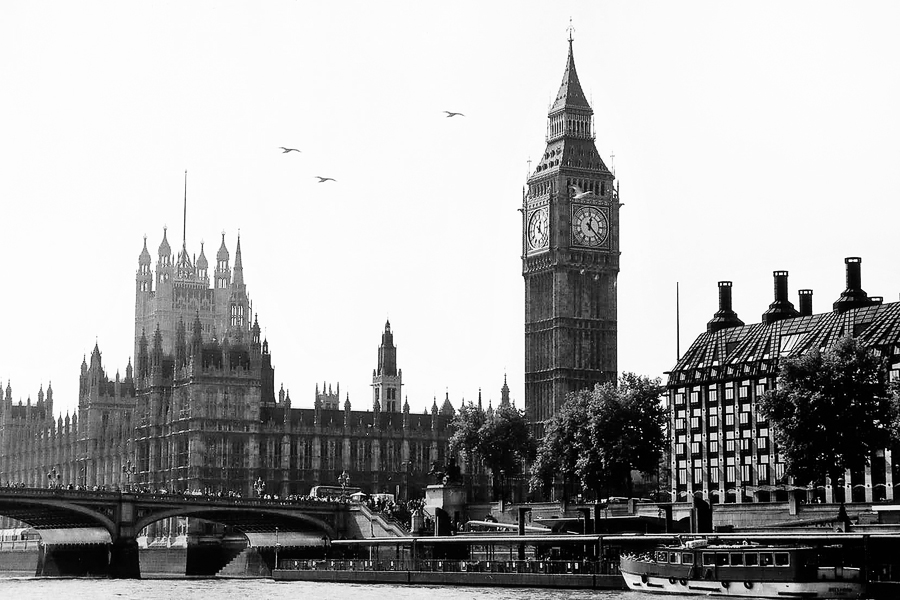
    As promised, I’ve finally gotten around to scanning a few film prints from my travels to England in 2003! This trip was incredibly special for so many reasons. It was my first time going anywhere in Europe, and I was visiting my parents who had moved to Lytham St Annes (near Blackpool) for my mom’s job. They were both excellent hosts, and made touring the country really fun and easy. The trip didn’t start out easy though – the day before I was scheduled to leave, I received notice that my flight was cancelled due to incoming Hurricane Isabel. I called the airline to ask about my options, and they informed me that they had one seat available on that evening’s flight and that it was mine if I wanted it! Great! Only…the flight was leaving in just under three hours. Oh, and I was at work, in Rockville, Maryland, which is at least a 45-minute drive from where I was living at the time. AND I hadn’t packed yet! So if you do the math, three hours minus the commute time, minus the required be-at-the-airport-two-hours-before-your-international-flight time, that left me less than 15 minutes to pack a suitcase for a week abroad. What I didn’t account for was how crazy the security lines would be at Dulles International Airport since everyone else had the same plan to get out of Dodge Virginia before the hurricane hit. Somehow I managed to throw a bag together and get a taxi to the airport in time, and thanks to the kindness of strangers who let me jump to the head of the security line, I just barely made my flight! And thanks certainly also go to my super sweet co-workers at the time who encouraged me to drop everything, covered the remainder of the day’s responsibilities for me, and allowed me to go, go, go. I’ll never forget how crazy that day was – that is not my preferred method of travel (I’m an obsessive planner), but it’s nice to know I can be super spontaneous, too!

    Once I arrived in England, my parents ensured that I saw an amazing sampling of the entire country. My mom and I took a fantastic side-trip via train to London for a few days where we saw just about every major must-see including Mamma Mia at Prince Edwards Theatre, my dad drove me all over the beautiful countryside to various castles and towns during the week, and we all took an overnight trip to Newcastle upon Tyne and went up to see Alnwick Castle, where parts of the first two Harry Potter movies were filmed! We even drove across the border into Scotland, so technically I’ve been there, too. (Chris and I are actually planning a proper visit to Scotland next year.) There’s still more I’d like to see in England so I’ll definitely go again someday, but I’m grateful I was able to see so much during this visit.

    Note: there aren’t many people-photos on this trip! At the time, I was really just into photographing scenery and details. I did snap a photo of my dad at Alnwick and I wish I had taken more photos of my parents and I together. I guess we’ll all just have to go back! Also, I used to be into scrapbooking and several of my photos ended up sliced-and-diced for the scrapbook pages, so I included a scan of my London two-page spread just for fun.

    0001_england_2003_blog

    0004_england_2003_blog

    0002_england_2003_blog 0003_england_2003_blog 0005_england_2003_blog 0006_england_2003_blog0007_england_2003_blog 0008_england_2003_blog 0009_england_2003_blog 0010_england_2003_blog0011_england_2003_blog 0012_england_2003_blog 0013_england_2003_blog